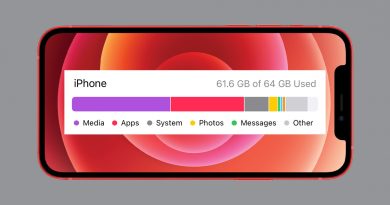
What to do before you sell your iPhone
The last thing you want to do when selling an Apple iPhone or iPad is to hand over a device with all your personal information and bank cards on board. Follow these few steps before you sell your iPhone and all will be well.
- Back up your iPhone data
- Use your old iPhone to set up your new one
- Sign out of iCloud and the iTunes & App store
- Unpair your Apple Watch
- Erase all content and settings
- Deregister iMessage
- Remove the iPhone or iPad from your trusted device list
Back up your iPhone data
There are two ways to back up your iPhone or iPad: via the internet on iCloud or locally on a Mac or PC computer. iCloud automatic, but it uses data and you may need to buy more storage space. The Mac method is manual, so you need to remember to back up at regular intervals.
Backing up your device not only saves your content, such as photos and videos, but also allows you to set up a new iPhone as a clone of the old one, with all networks, passwords, etc, intact.
iCloud and computer backups differ slightly in what they save. With this in mind, and also because we believe that you can never have too many backups, we back up our iDevices to both and suggest doing this before you sell your iPhone.
How to back up an iPhone on iCloud
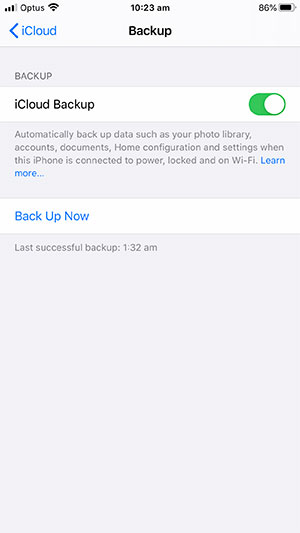
- Make sure your phone is connected to a Wi-Fi network
- Go to Settings > Apple ID (the top one, where your name appears) > iCloud > iCloud Backup
- If iCloud Backup isn’t on, turn it on now and wait for the backup to finish (it might take a while if you have a lot of stuff on your phone)
- If iCloud Backup is on, tap on Back Up Now, and wait for the backup to finish
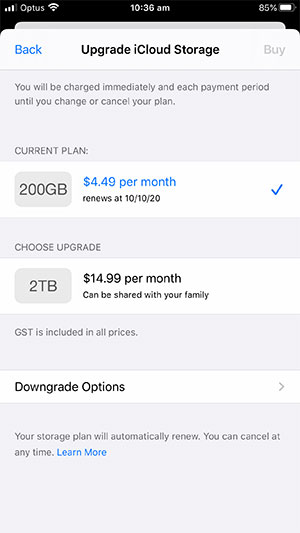
You get 5GB of online storage space when you first sign in to iCloud – your iPhone will tell you if this isn’t enough to complete the backup. Follow these steps if you need to buy more storage:
- Go back to Settings > Apple ID > iCloud
- Tap on Manage Storage > Change Storage Plan
Plans range from 50GB for $1.49 a month to 2TB for $14.99 a month, and you can share it with your family.
How to back up an iPhone on a computer
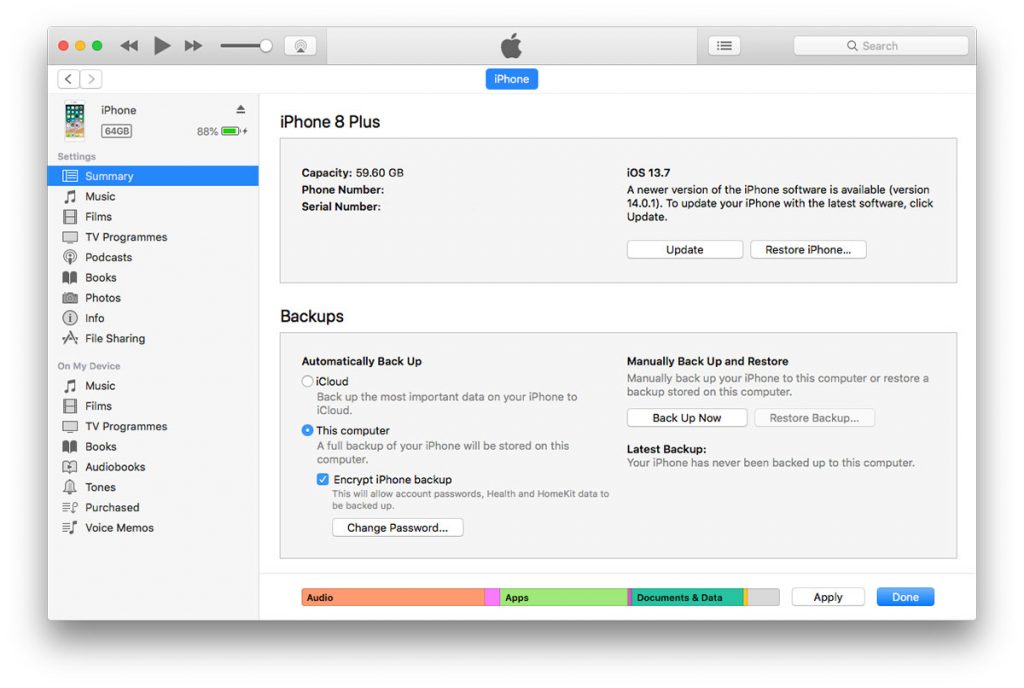
- Connect your iPhone or iPad to your computer using a Lightning cable.
- Open iTunes if you’re on a Mac running macOS Mojave 10.14 or earlier, or on a PC. If you’re on a Mac running macOS Catalina 10.15, open Finder. You might be prompted for a passcode and/or asked if you want to Trust This Computer or allow access.
- Locate your iPhone in the window that opens: If you’re using Catalina it’ll be in the sidebar on the left of the window; if you’re on Mojave or earlier, there will be a little iPhone icon at the top left, just under the volume bar.
- Click on the option to back up all the data on your iPhone to your Mac or PC. (You can also start the iCloud backup process from here.)
- Click the Encrypt iPhone Backup or Encrypt Local Backup option (the wording varies depending on your operating system) if you want to protect passwords and save sensitive health and activity data from your phone or Apple Watch.
- If you’re using Mojave or earlier, you can also just click the manual Back Up Now button to the right of the window.
- Wait for the backup to finish
Use your old iPhone to set up your new one
You don’t have to do this step before you sell your iPhone, but Apple’s Quick Start is a dead handy method of automatically starting the setup of a new iPhone or iPad.
- Make sure Bluetooth is turned on on your old iPhone, then place it next to your new one. A window will appear on the old phone asking if you want to set up the new one using your Apple ID.
- Click Continue and an animation will appear on your new iPhone. Hold your old one over the new one and centre the animation in the viewfinder.
- Once the process is finished (you’ll see a message) you’ll be prompted to set up Face ID or Touch ID on the new phone and enter your Apple ID passcode.
Once this is done, you’ll be able to transfer data between the phones, or restore apps, data and settings from your iCloud or computer backup. (See above.)
Sign out of iCloud and the iTunes & App store
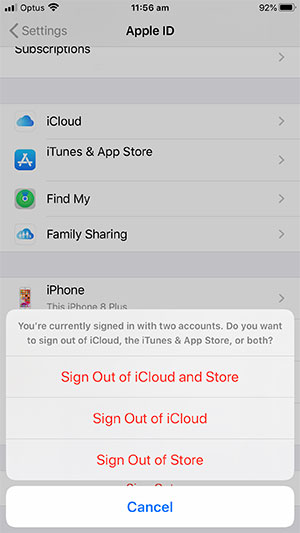
- Go to Settings > Apple ID (the top one, where your name appears) then scroll all the way to the bottom of the screen and tap where it says Sign Out in red
- If you’re signed in with multiple accounts for iCloud and the iTunes & App Store you’ll be asked if you want to sign out of one or the other, or both.
- Enter your Apple ID password and tap Turn Off in the top right corner
Unpair your Apple Watch
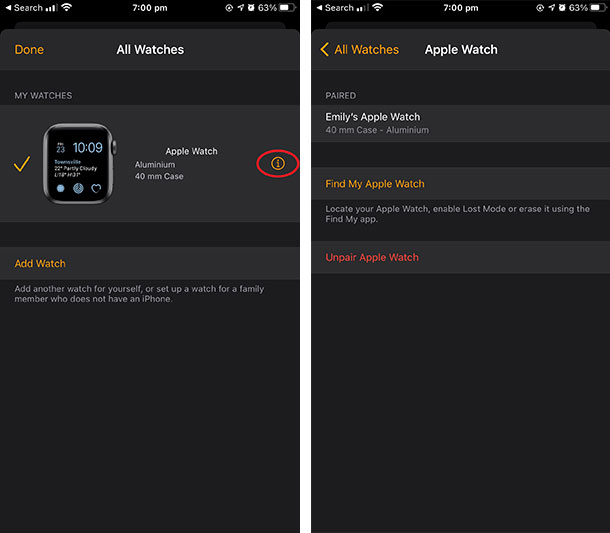
- Place your iPhone and Apple Watch close together
- Open the Watch app on your phone
- Tap on the My Watch tab and select All Watches
- Identify the watch you’d like to unpair and tap on the orange ‘i’ button to its right
- Tap Unpair Apple Watch
- At this stage you’ll need to choose to keep or remove your mobile-phone plan. Keep it if you plan on pairing the watch with your new iPhone.
- Enter your Apple ID password if needed to disable Activation Lock.
This will unpair your Apple Watch and restore it to its factory settings. However, during the process your iPhone will have created a new backup of your Apple Watch, which you can use to restore it.
Erase all content and settings
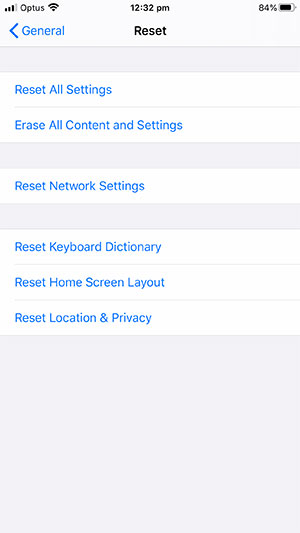
This is a fairly obvious step to take before you sell your iPhone, and possibly the most important one.
- Go to Settings > General and scroll to the very bottom of the screen
- Tap Reset > Erase All Content and Settings
- If you haven’t updated your iCloud backup it will prompt you to do this before proceeding
- You might need to enter your Apple ID and password if you have Find My iPhone turned on.
- Enter your iPhone or iPad passcode and tap Erase
Deregister iMessage (if you’re not moving to a new Apple device)
Because Apple devices use iMessage for texting, if you don’t turn iMessage off before you sell your iPhone (or after) and switch to a non-Apple phone you might not receive your SMS or MMS messages.
(iMessages are those texts, photos and videos that you receive in blue bubbles. They can only be sent between Apple devices, can be sent via Wi-Fi as well as a phone network and are encrypted. The green messages you receive are normal, unencrypted messages that can only be sent via a phone network.)
If you still have your Apple device
- Put your SIM card back into your iPhone or iPad
- Go to Settings > Messages and turn off iMessage
- While you’re about it, it doesn’t hurt to turn off Facetime by going to Settings > Facetime
If you no longer have access to your phone
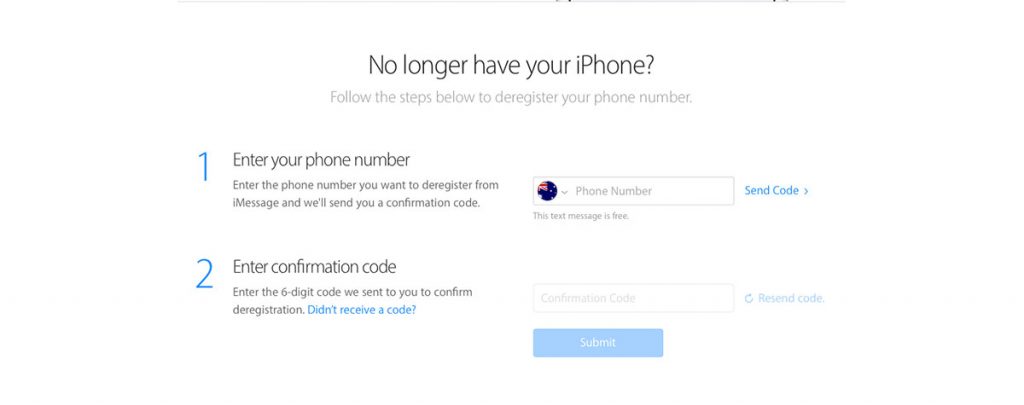
- Head to https://selfsolve.apple.com/deregister-imessage/
- Enter your phone number and click Send Code (you’ll get this code no matter what phone you’re using)
- Enter the 6-digit confirmation code and click the Submit button
Apple says it might take a few hours for other Apple devices to realise that you’re not using iMessage, but you should be able to receive normal text messages straight away.
Remove your iPhone or iPad from your trusted device list
Your trusted device list shows the Apple products you’re signed in to with your Apple ID. There are a number of ways you can remove a device from the list before you sell your iPhone:
Through iCloud on a web browser
- Go to https://www.icloud.com/ and sign in to your iCloud account
- Click on your name in the top right of the window and choose Account Settings from the drop-down menu
- You’ll see your iPhone or iPad under the My Devices heading
- Click on it, then click on the X in a blue circle that appears on the right
- A warning dialogue will appear. Click Remove
On your iPhone
- Go to Settings > Apple ID (the top one, where your name appears)
- Scroll down until you see your list of devices
- Tap on your iPhone or iPad, then on Remove from Account
On a Mac running the Mojave operating system (version 10.14) or earlier
- Go to the Apple menu (the Apple symbol in the top left corner) and open System Preferences
- Alternatively, click on the System Preferences icon in your Dock
- Click on iCloud > Account Details
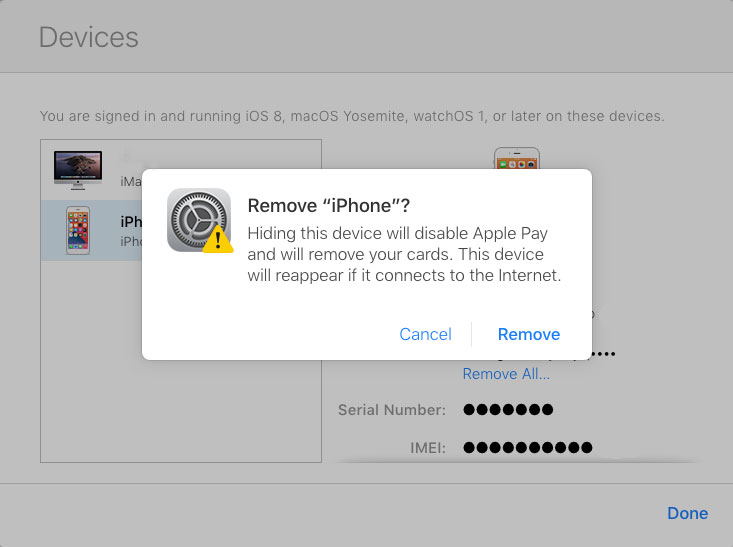
- Click on the Devices tab
- Click on the iPhone or iPad you’d like to remove, then click the Remove from Account button
- A warning dialogue will appear. Click Remove
On a Mac running the Catalina operating system (version 10.15)
- Go to System Preferences using one of the methods above
- Select Apple ID and click on the iPhone or iPad in the sidebar